

Uncategorized
How to Connect a Bus Bar to a Battery: A Complete Step-by-Step Guide
Introduction
Whether you’re building a solar power system, upgrading an RV electrical setup, installing a marine battery bank, or organizing a custom off-grid energy system, knowing how to connect a bus bar to a battery is essential. A properly installed battery bus bar improves power distribution, reduces wiring clutter, and enhances the overall safety and efficiency of your electrical system.
In this guide, we’ll walk you through the process of connecting a bus bar to a battery while covering key safety tips, required tools, and best practices for reliable performance.
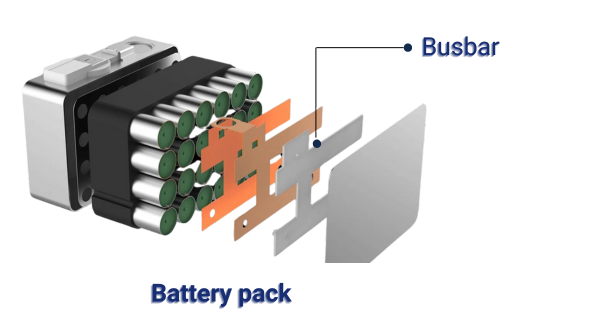
What Is a Bus Bar?
A bus bar is a conductive metal strip or block used to distribute electrical power from a battery to multiple devices or circuits. Instead of connecting several cables directly to a battery terminal, a bus bar serves as a central connection point.
Benefits of using a battery bus bar include:
- Cleaner and more organized wiring
- Improved electrical efficiency
- Easier system maintenance
- Enhanced safety and reliability
- Better power distribution for multiple devices
Bus bars are commonly used in solar energy systems, marine applications, RV electrical systems, automotive projects, and industrial battery banks.
read more: https://vapestore-australia.com/
Tools and Materials You’ll Need
Before connecting a bus bar to a battery, gather the following equipment:
- Positive and negative bus bars
- Battery cables
- Cable lugs or terminals
- Wrenches or socket set
- Heat shrink tubing
- Battery fuse or circuit breaker
- Multimeter
- Safety gloves and eye protection
Using high-quality components helps ensure long-term performance and minimizes the risk of electrical issues.
Step 1: Disconnect the Battery
Safety should always be your top priority. Before starting any electrical work, disconnect the battery completely.
Begin by removing the negative terminal, followed by the positive terminal. This reduces the risk of accidental short circuits and electrical sparks during installation.
Step 2: Mount the Bus Bar Securely
Choose a dry, accessible location near the battery. Securely mount the bus bar using the manufacturer’s recommended hardware.
Avoid placing the bus bar where it may be exposed to excessive moisture, vibration, or physical damage. Proper placement helps improve system longevity and simplifies future maintenance.
Step 3: Connect the Battery to the Bus Bar
Connect the positive battery terminal to the positive bus bar using an appropriately sized battery cable. Install a fuse or circuit breaker as close to the battery as possible for added protection.
Next, connect the negative battery terminal to the negative bus bar using a matching cable.
Ensure all cable connections are tight, clean, and corrosion-free. Loose connections can cause voltage drops, overheating, and reduced system efficiency.
Step 4: Connect Electrical Loads
Once the battery is connected to the bus bars, attach your electrical devices, inverters, chargers, solar charge controllers, or distribution panels to the appropriate bus bar terminals.
Using a bus bar allows multiple devices to receive power from a single centralized location, creating a more professional and organized electrical installation.
Step 5: Test the System
After all connections are complete, reconnect the battery terminals and inspect every connection carefully.
Use a multimeter to verify voltage levels and confirm proper power distribution throughout the system. Check for abnormal heat, loose terminals, or signs of poor connectivity.
Testing helps identify potential issues before they become costly problems.
Common Mistakes to Avoid
When installing a battery bus bar, avoid these common errors:
- Using undersized cables
- Skipping fuse protection
- Overloading the bus bar
- Leaving connections loose
- Mounting the bus bar in damp locations
- Failing to follow manufacturer specifications
Preventing these mistakes can significantly improve system safety and performance.
Final Thoughts
Connecting a bus bar to a battery is one of the best ways to create a clean, efficient, and reliable electrical system. Whether you’re working on a solar power setup, RV electrical system, marine installation, or battery bank project, a properly installed bus bar simplifies wiring and enhances power distribution.
By following the correct installation steps and prioritizing safety, you can build a professional-grade electrical system that delivers dependable performance for years to come.